Learn How to Import PST to Office 365 Without Duplicates in Just 5 Steps
Do you want to import PST to Office 365 without duplicates? Are you looking for a trustworthy solution to do the same? Then, you have reached the right blog this write-up explains both the manual and the automated solution for this task.
Well, there are various advantages that users get while importing PST files to Office 365 skip duplicates, as the data kept in the cloud is safe enough and could be easily accessed irrespective of the location.
But, the question arises when an organization needs to import multiple PST files to Office 365. There are chances that duplicate PST files are uploaded more than once. So, readers let’s explore the methods to be followed, which have been explained in this blog in a seamless way.
Let’s Follow a Scenario
“I am working as an IT Administrator in a reputed organization. Recently, our organization has decided to move the PST files to Office 365. As there are multiple PST files of all the employees which is to be imported to O365. However, we tried the manual method, which is Network Upload and Drive Shipping methods. But, it is not feasible as we see there are also duplicate PST files that are uploaded. So, please let me know the correct procedure to migrate PST files to Outlook 365. Kindly reply back at the earliest possible, thanks!”
In the above-described scenario, an organization has to import multiple PST files to Office 365. Here, Network Upload is not a convenient solution to migrate the PST file to Outlook 365. This method is advised only for technical experts and also one should download Azure Azcopy first. Moreover, this process takes a long time which ultimately wastes the valuable time of the employees.
5 Simple Steps to Import PST to Office 365 without Duplicates
- Step 1. Download, Install, and Launch the Software.
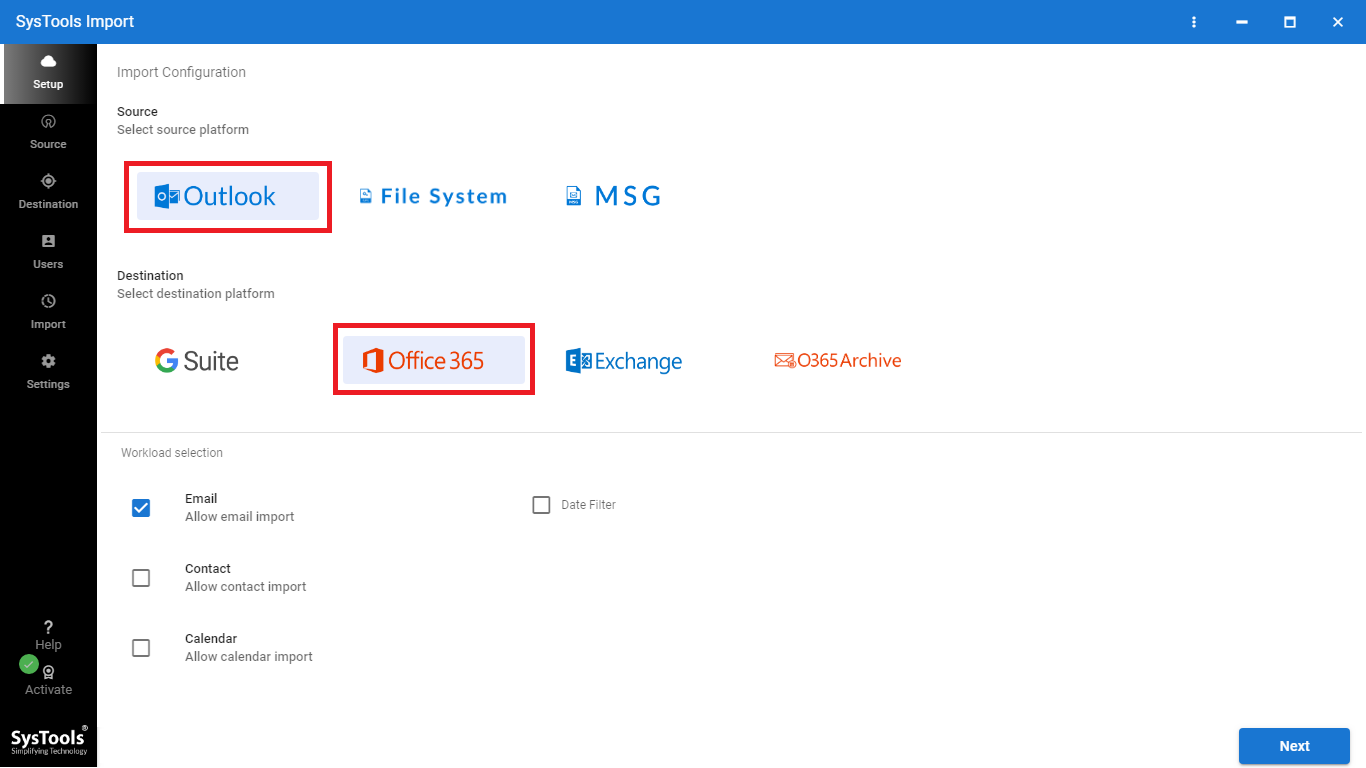
- Step 2. Select Outlook & Office 365 as Platforms.
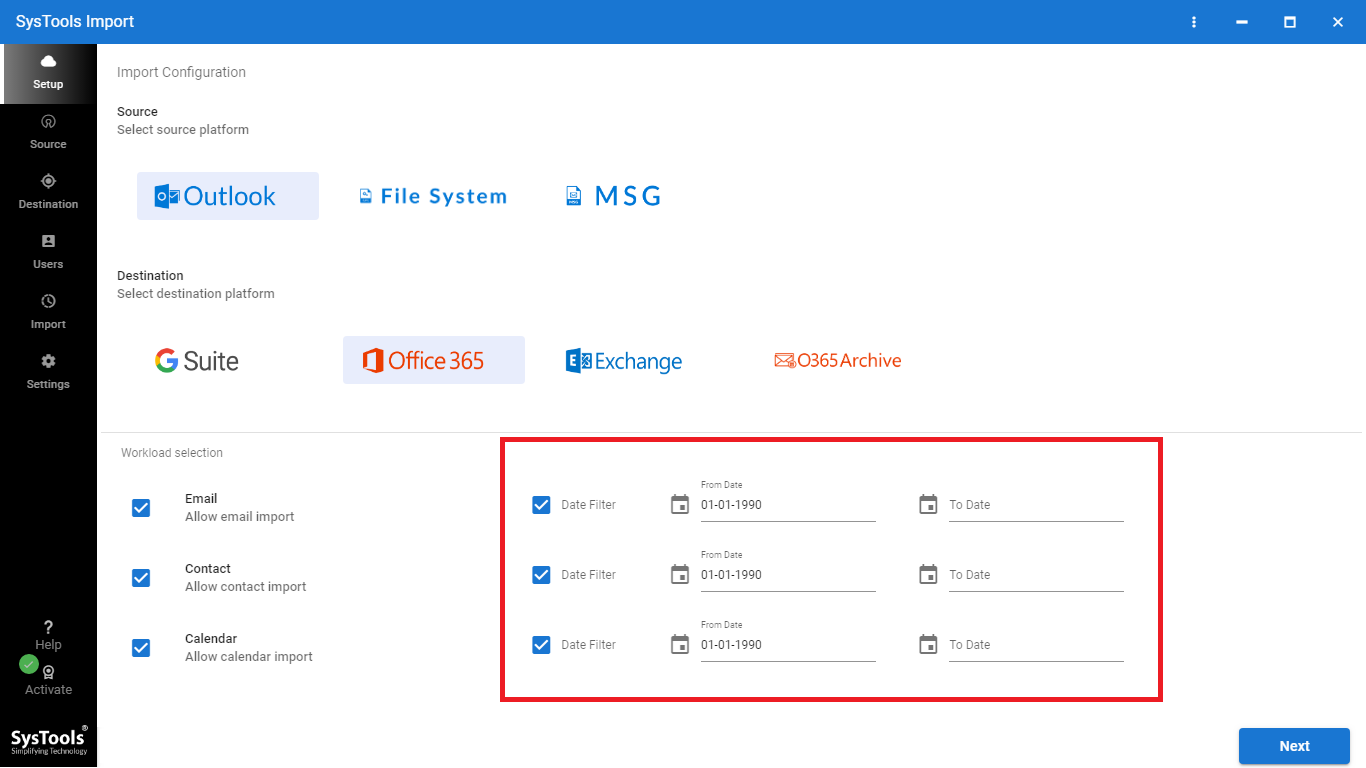
- Step 3. Choose Items & Set Date Filter.
- Step 4. Login with Office 365 Admin Credentials.
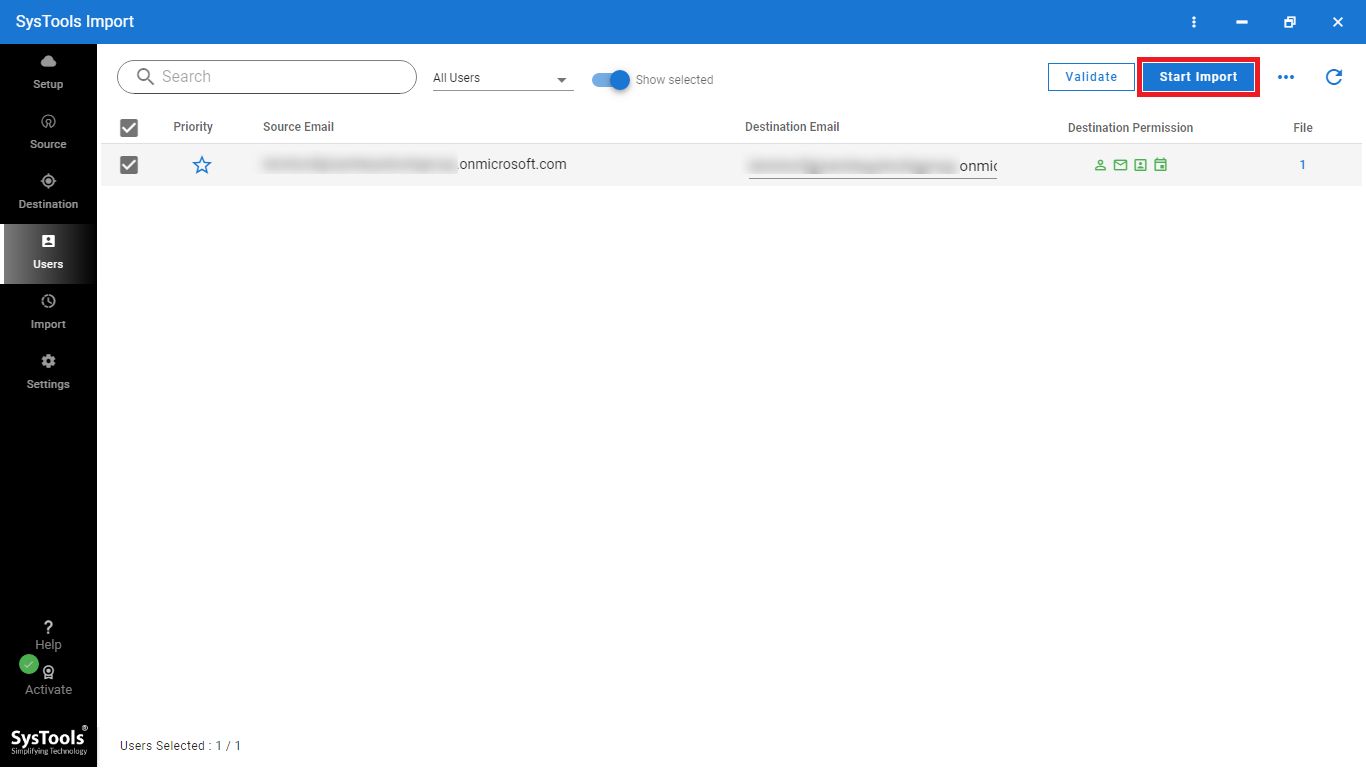
- Step 5. Validate User Accounts & Click on Import.
On the other hand, the Drive Shipping method also proves fatal considering the organization’s perspective. In this method, the user needs to save the respective PST files to the hard drive and physically ship it to Microsoft. Once the data is received by Microsoft, it will copy the data to the cloud.
This is also a time taking procedure and must be carried out in a proper procedure as recommended by Microsoft. There are some additional requirements as well like PST files should not be larger than 20 GB, assigning Mailbox Import Export role in Microsoft Exchange, etc. All these prerequisites make the process more difficult.
Using Outlook Import/Export Wizard to Upload PST to Office 365 Without Duplicates
Another manual method is to use the inbuilt feature Import/Export Wizard of Outlook. You can use Outlook to upload your PST files while skipping the duplicates. As it offers the option to skip duplicates while executing the same.
Let’s discuss the steps for this task;
Step 1. Configure your Office 365 account in Outlook.
Step 2. Open Outlook and Navigate to File. Select the Open & Export option from the dropdown.
Step 3. Click on Import/Export and choose the Import from another program or file option. Then click the Next tab.
Step 4. Choose Outlook Data File (.pst) option from the drop-down and click on the Next button.
Step 5. Browse and select PST files from your computer. Enable the Do not import duplicates tab.
Step 6. Now click on Finish to Import PST to Office 365 Without Duplicates.
Note: This method is recommended only for a single user account with limited PST data. It is not practical to import PST files into multiple Office 365 accounts with larger data sizes.
What is the Alternate Solution to Import PST to Office 365 without Duplicates?
Office 365 Import Tool is the ultimate solution, which is much better than the manual methods. The main function of the tool is to import multiple Outlook PST files to Office 365 for both User and Admin accounts. It is a fully equipped tool that does not require much technical expertise, thus enabling a naive user to adopt this tool. The Date-filter option allows the importing of selective data to an Office 365 profile.
The Incremental Import option enables users to import PST to Office 365 without duplicates. Moreover, one can easily download and install this tool on Windows 10, 8.1, 8, 7, and other lower versions. This software is also compatible with Outlook 2019, 2016, 2013, 2010, 2007, etc. It is an amazing tool packed with powerful algorithms and has an easy-to-understand interface.
Why Choose Software Over the Manual Method to Upload PST to Exchange Online Office 365 without Duplicates?
- The Network upload which is the manual method is currently available only for a few countries. Whereas the tool is available worldwide the globe
- Network Upload, allows only 24 GB of data of PST data to import into Office 365. Whereas, the tool enables to import of multiple PST files irrespective of the file size
- The manual procedure does not allow to import PST files to the public folders of Outlook 365. On the other hand, the tool can overcome this manual failure
- PST files that are larger than 150 MB will be omitted from import in the Drive Shipping method, while with the software there is no such restriction. Thus, importing the PST file to Outlook 365 without duplicates
- In the Drive Shipping method, nested PST folders with more than 300 levels are not imported to MS O365. On the other hand, the software allows importing of multiple nested folders
Must Read: Learn various method to Import Outlook Folders to Office 365
Simple Working of Office 365 Import Tool
Step 1. Download and Install the Tool
First, you need to get the software on your computer. Follow these steps:
- Click on the download buttons provided.
- The installation file will be saved in your chosen download folder.
Step 2. Choose Platforms – Office 365 & Outlook
After downloading the software, you’ll be moved on to the next step. Follow these instructions:
- Launch the tool and choose the platforms you want to work with. Pick Outlook as the source and Office 365 as the destination.
Step 3. Manage Workload & Apply Date Filter
This step helps you manage your work effectively. Here’s how to do it:
- Select the workload you want to import.
- Look for the “Date Filter” option.
- Apply the date filter to import data from a specific time period into Office 365.
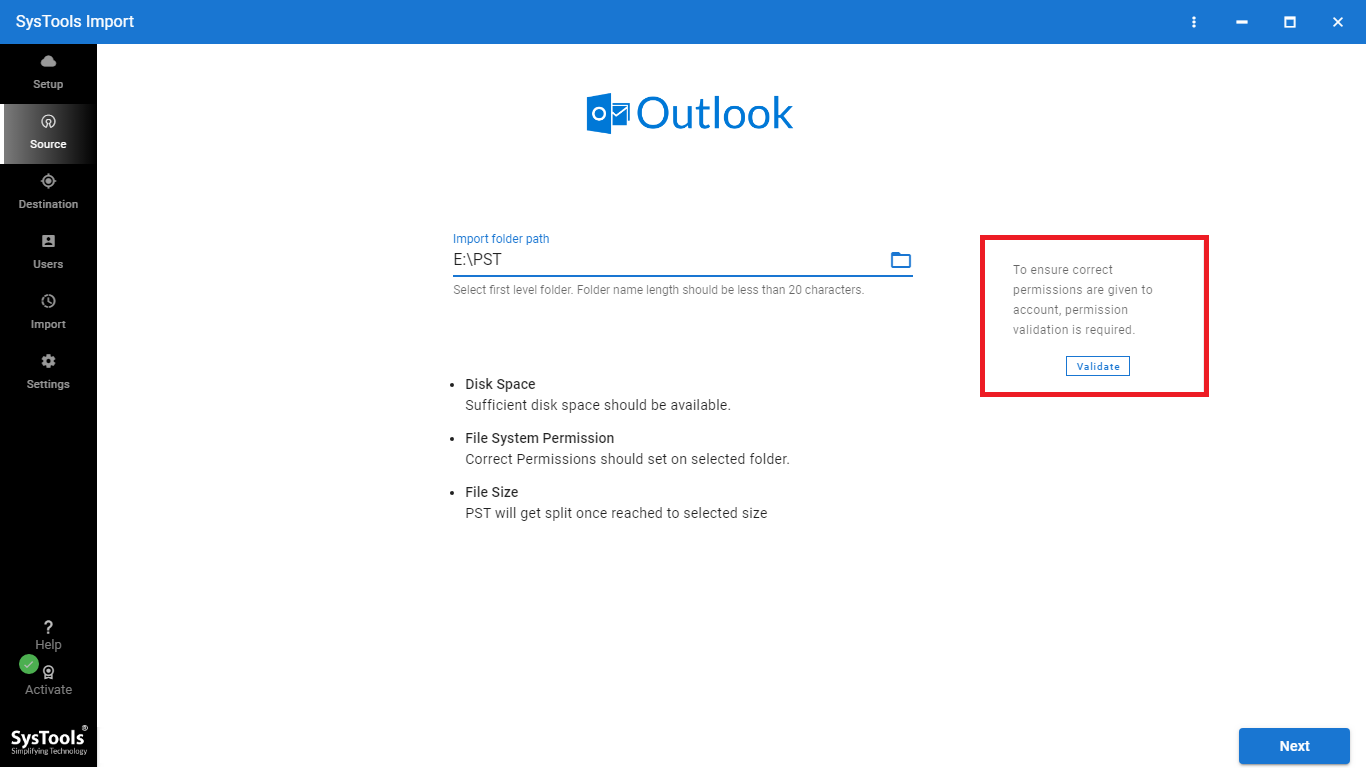
Step 4. Authenticate Source & Destination Platforms
To protect your data and ensure secure interactions, we have a strong authentication system. Follow these steps:
- Authenticate both the source and destination platforms.
- Your privacy and data security are important to us, and this authentication process adds an extra layer of protection.
Step 5. Add and Choose Users
Now, let’s add Office 365 users to the software panel. There are three methods to do this:
- Fetch Users: Automatically fetch users from the source.
- Import Users: Use a CSV file to import users.
- Download Template: Download a template to create a CSV file.
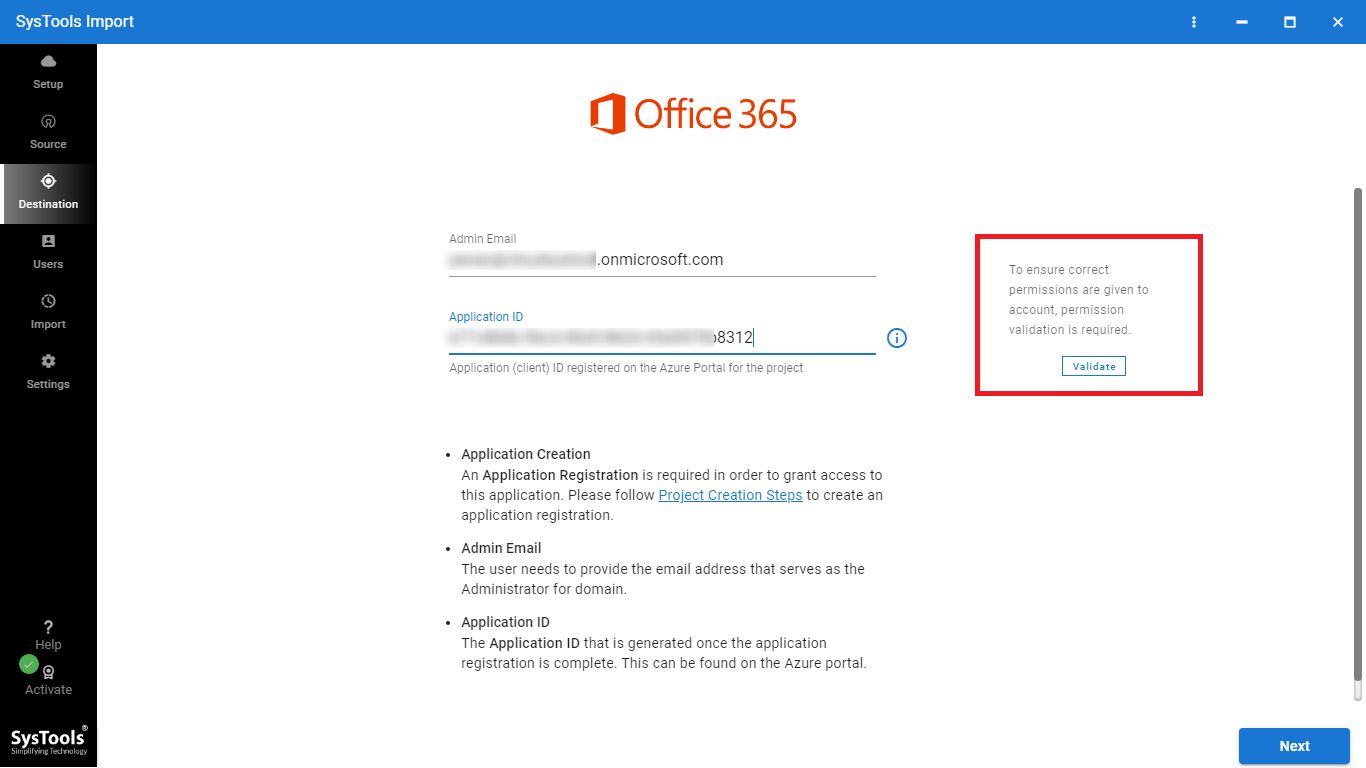
After adding users, select and validate the necessary permissions.
Step 6. Once you’ve validated the users and permissions, follow these steps:
- Click on the “Start” button.
- This will upload PST files to your Office 365 account without duplicates.
- Get ready for an efficient and streamlined import process.
Also Read: How to Import iPhone Contacts into Outlook 365?
Let’s Wrap Up
Manual methods Network Upload and Drive Shipping fail to import PST to Office 365 without duplicates. The process takes a lot of time which is not a feasible approach. Therefore, it is advised to use the above-mentioned tool, a reliable solution with multiple features and functionalities. It is designed with advanced algorithms by industry experts to import the Outlook PST file while skipping the duplicates. It has a friendly interface that swiftly imports multiple PST files in a hassle-free way.

