Migrate iCloud Email to Gmail & Access All the Data in Gmail
Sometimes, users shift from iOS to Android in several cases. Now, iOS users have iCloud to store all their data & after the switch, most of them migrate iCloud email to Gmail.
Why Gmail?
Because it is a highly known email service that allows communication and collaboration on a large scale. Also, there are various other functions that Gmail provides which the user can access whenever there is a need.
There are also a few users who might need to switch their email client for the following reasons:
- iCloud storage is lesser than Gmail.
- Users might want to manage their data on both the accounts.
- You might need to send some emails over Gmail or access them, hence, you export iCloud mail to Gmail.
- To keep a backup of the data in a Gmail account.
Whatever may be the reason, there is only one direct solution that we are going to explain soon.
Here are the steps for the direct method.
- Select iCloud as your Source & enter the credentials.
- Choose Gmail as Destination & provide login details.
- Apply the Date-filter for selective data migration.
- Hit Start Migration to finish the procedure.
These are the easiest steps to complete a migration process within a few minutes.
Let’s move towards the methods.
Migrate iCloud Email to Gmail by Applying Both Manual & Professional Methods
First comes the best & most recommended solution by experts i.e. the professional method. This method has a quick migration technique and the algorithms are made in such a way that it becomes easy for the non-techies too.
The second method is the manual method with the following stages:
- Converting Data to OST File
- Exporting Converted Files to PST
- Configuring Gmail in Outlook
All of these steps are a little hard to perform altogether. Starting with the first method.
How to Export iCloud Mail to Gmail Using the Professional Method?
This method is the IMAP Mailbox Migration Tool on Mac and is capable of migrating data in bulk.
It has the ability to export data from multiple accounts at a single shot with no sign of data-loss. The guarantee to migrate emails with the same folder hierarchy is given.
If you want to transfer data files from a specific time-duration only, applying the Date-filter would be the best. It allows you to set the duration and pick the files from that period only.
After you migrate iCloud email to Gmail, you can apply the Delta Migration feature as well. The function permits users to migrate only the newly arrived data files to the target account and save time on the user’s end.
Also Read: If you want to transfer iCloud emails to Outlook, here is all the information available.
Quick Glance at the Steps of the Wizard to Migrate All the Emails
1. Run the software and install it. From the Source list, choose iCloud and enter the login details for it. Validate your account.

2. Click on the Gmail option from the Destination list and give in the username & password to export iCloud mail to Gmail. For confirmation, hit the Validate option.

3. Insert more email addresses if the need be by clicking on the Add Here, the mapping will start.

4. Mark the Apply Date-filter checkbox to make use of this filter. Set the dates for your time-duration in the “from” and “to” sections.

5. The final step is to tap on the Start Migration button and wait for the procedure to finish.

It should take about a few minutes to migrate all the data. Once it is completed & in case you receive emails between the transfer, use the Delta Migration feature.
Stage 1 – Migrate iCloud Email to Gmail by Converting the Data Files
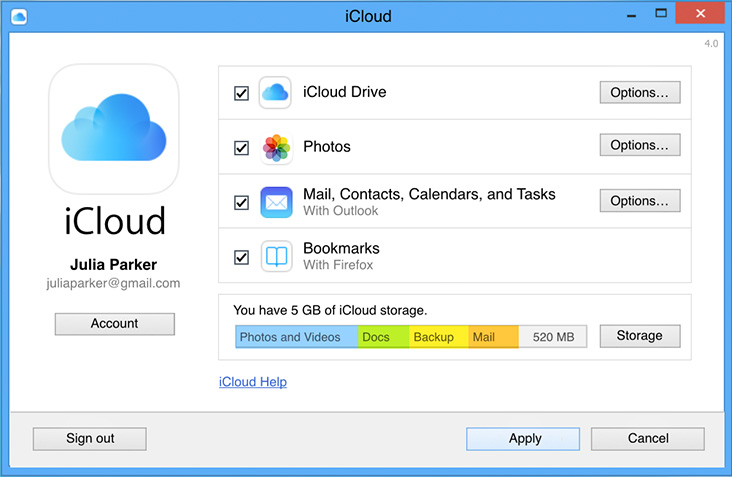
Here, we are going to use the iCloud Control Panel to migrate the data since there is no option available to download them.
Go through the following instructions:
1. Open the iCloud Control Panel & choose the Mail option from there. Click on the Apply option.
2. After that, the emails will directly open in the Outlook application.
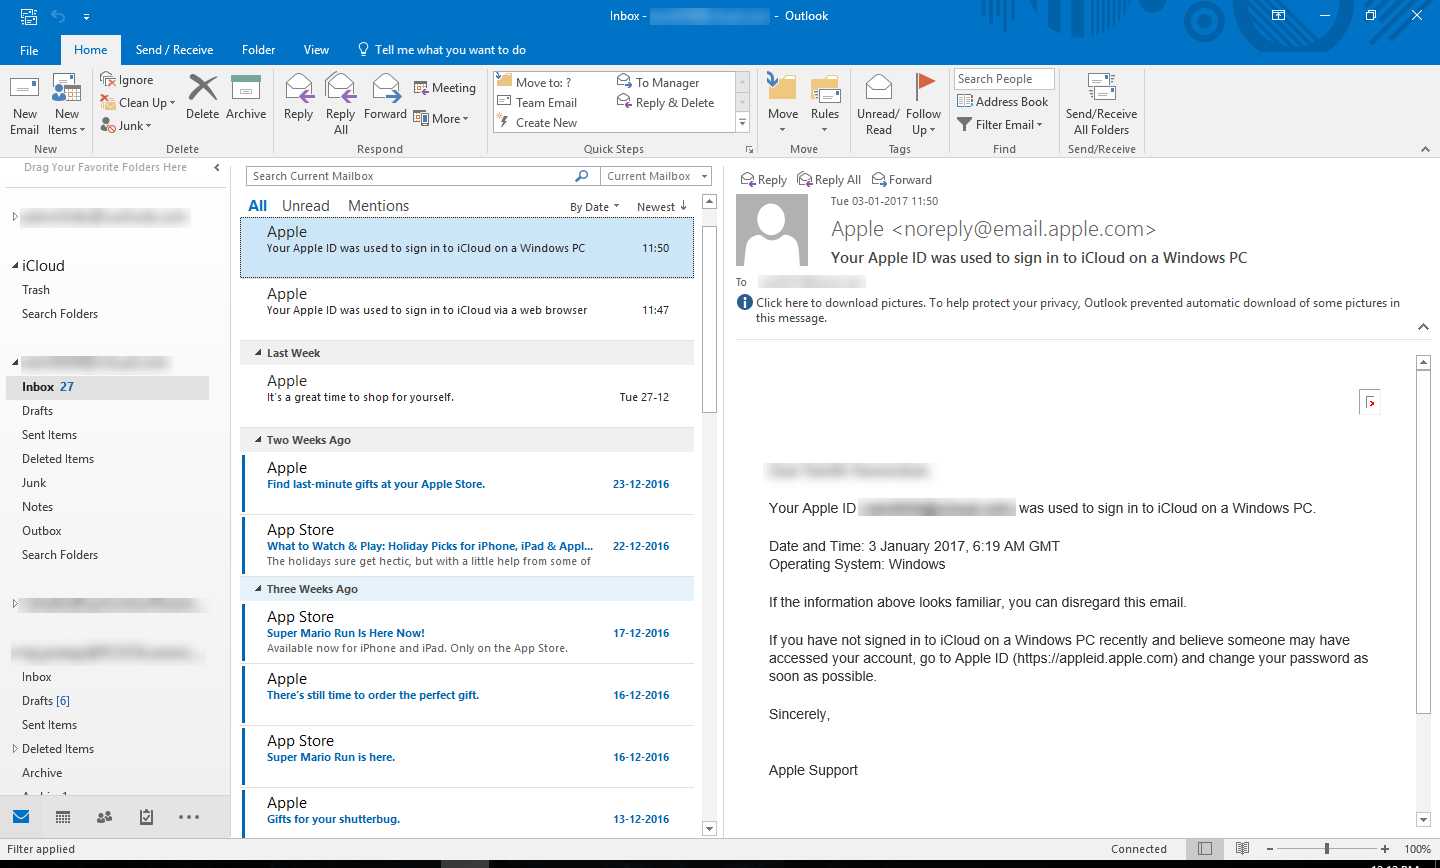
Note: Your account will automatically be configured as IMAP and you will not have to enter any details.

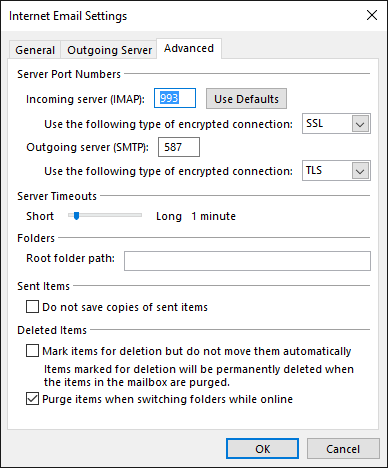
3. Enter the Incoming Server Port No. as 993 and Outgoing Server Port No. as 587 and hit OK.
4. To export iCloud mail to Gmail, create the OST file and the data will be converted.
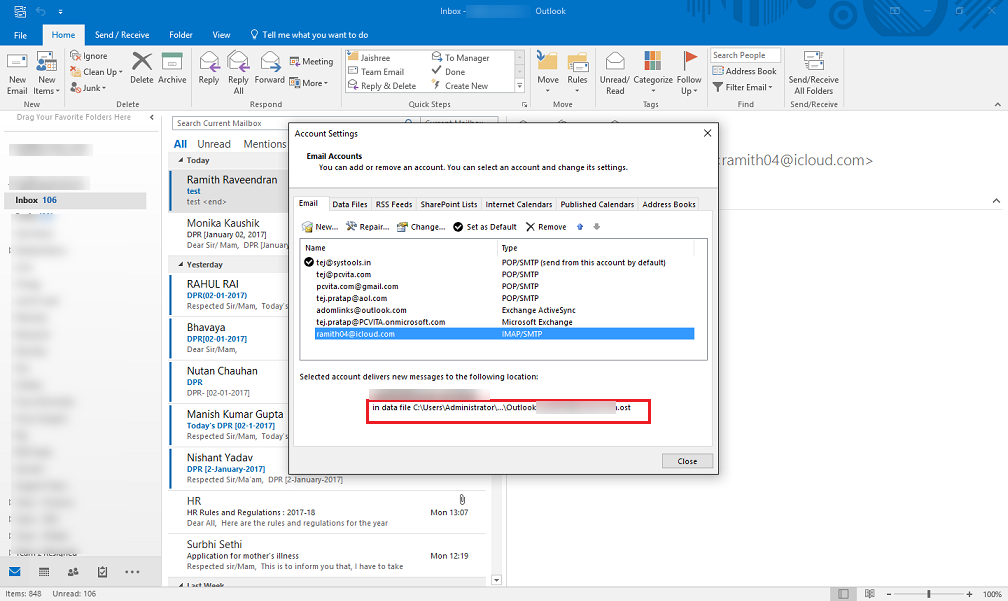
After creating the OST data files, we will start the export process.
Stage 2 – Exporting Converted Files to Outlook Supported Format (PST)
1. Launch Microsoft Outlook & click on the File tab from the toolbar.

2. Choose the Open & Export option and hit Import/Export to open the Import/Export Wizard.
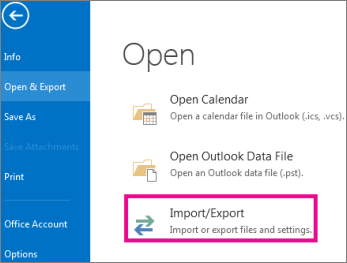
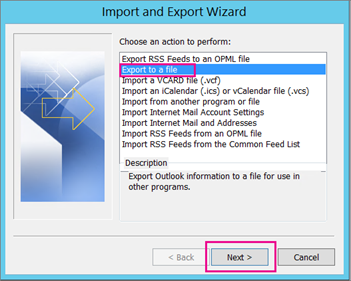
3. Then, select the Export to a file option from there and hit the Next button.
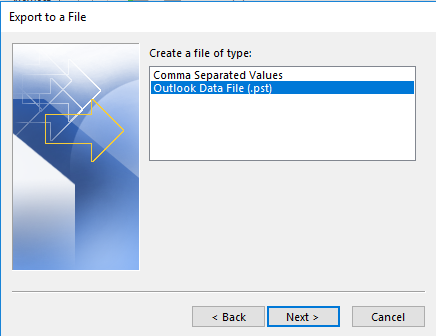
4. Click on the Outlook Data File (.pst) option for the process to migrate iCloud email to Gmail. Press on the Next button to move further.
5. After doing so, you have to click on the Browse button and choose the data files from your system that you want to export.
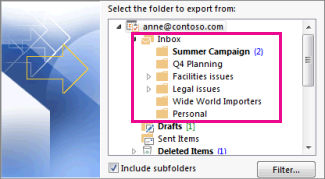
6. Checkmark the Include Subfolders option to export data from the subfolders as well. Tap on the Finish button to complete the operation.
With this process, all your OST files will be exported in the other format supported by Outlook i.e. PST.
Now, the last stage of this procedure which also uses the Outlook application & requires configuration.
Stage 3 – Export iCloud Mail to Gmail Via Configuration in MS Outlook
Firstly, remove the configuration of iCloud from Outlook and then, follow these steps:
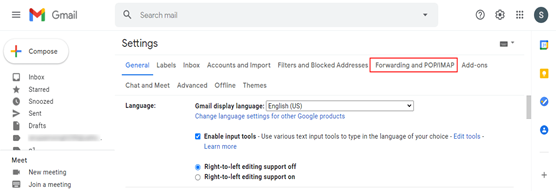
1. Login to your Gmail account and click on the Gear Choose the See All Settings option.

2. From the new window that appears, choose the Forwarding and POP/IMAP tab.
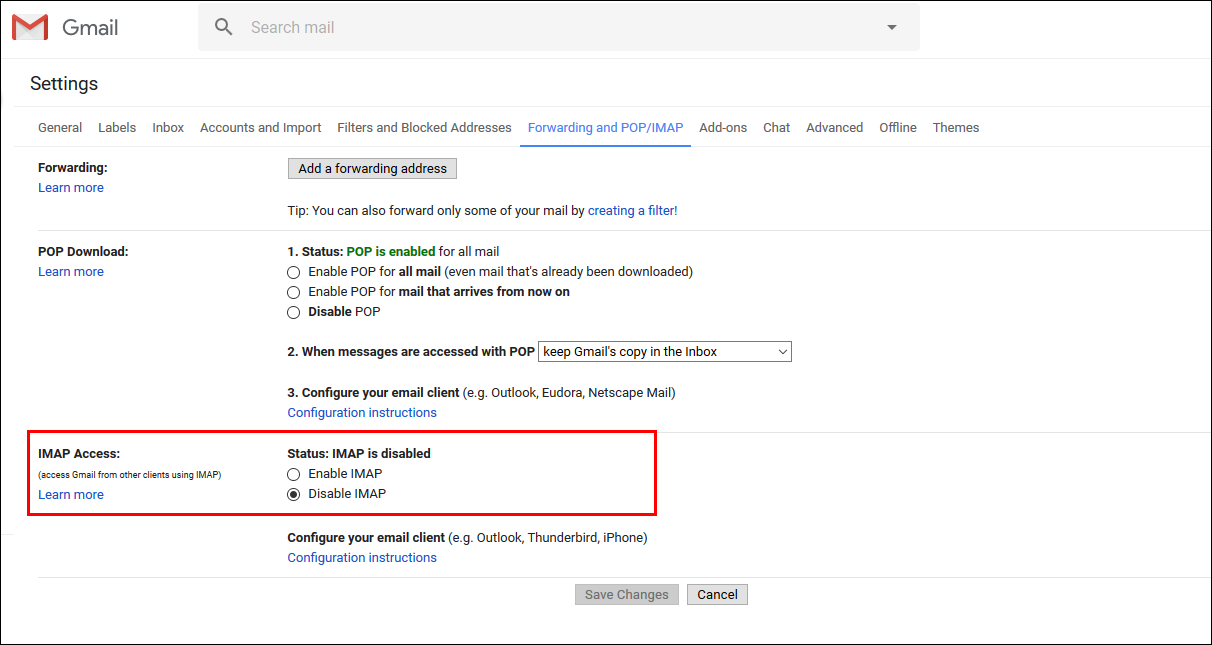
3. Select the Enable IMAP radio button if it is not marked and hit the Save button.
4. After that, configure your Gmail account with Outlook and export the data in the Gmail account via drag & drop.
Confusing, isn’t it? This is why the tool is there to rescue.
Wrapping Up
It is not easy to migrate iCloud email to Gmail when there are manual steps applied. Clearly enough, manual techniques only make it a more complex and lengthy procedure. When you can easily perform the operation directly, why go through such troubles?
Thus, experts also recommend using the software instead of the manual steps to complete the entire procedure in a jiffy.


